HOW TO SAVE FLOOD DAMAGED PHOTOS
As part of the Esk Valley / Bay View community, it has been heartbreaking to spend time in the hardest hit areas in the aftermath of Cyclone Gabrielle, helping friends dump their entire worldly possessions onto the street with little hope of saving anything.
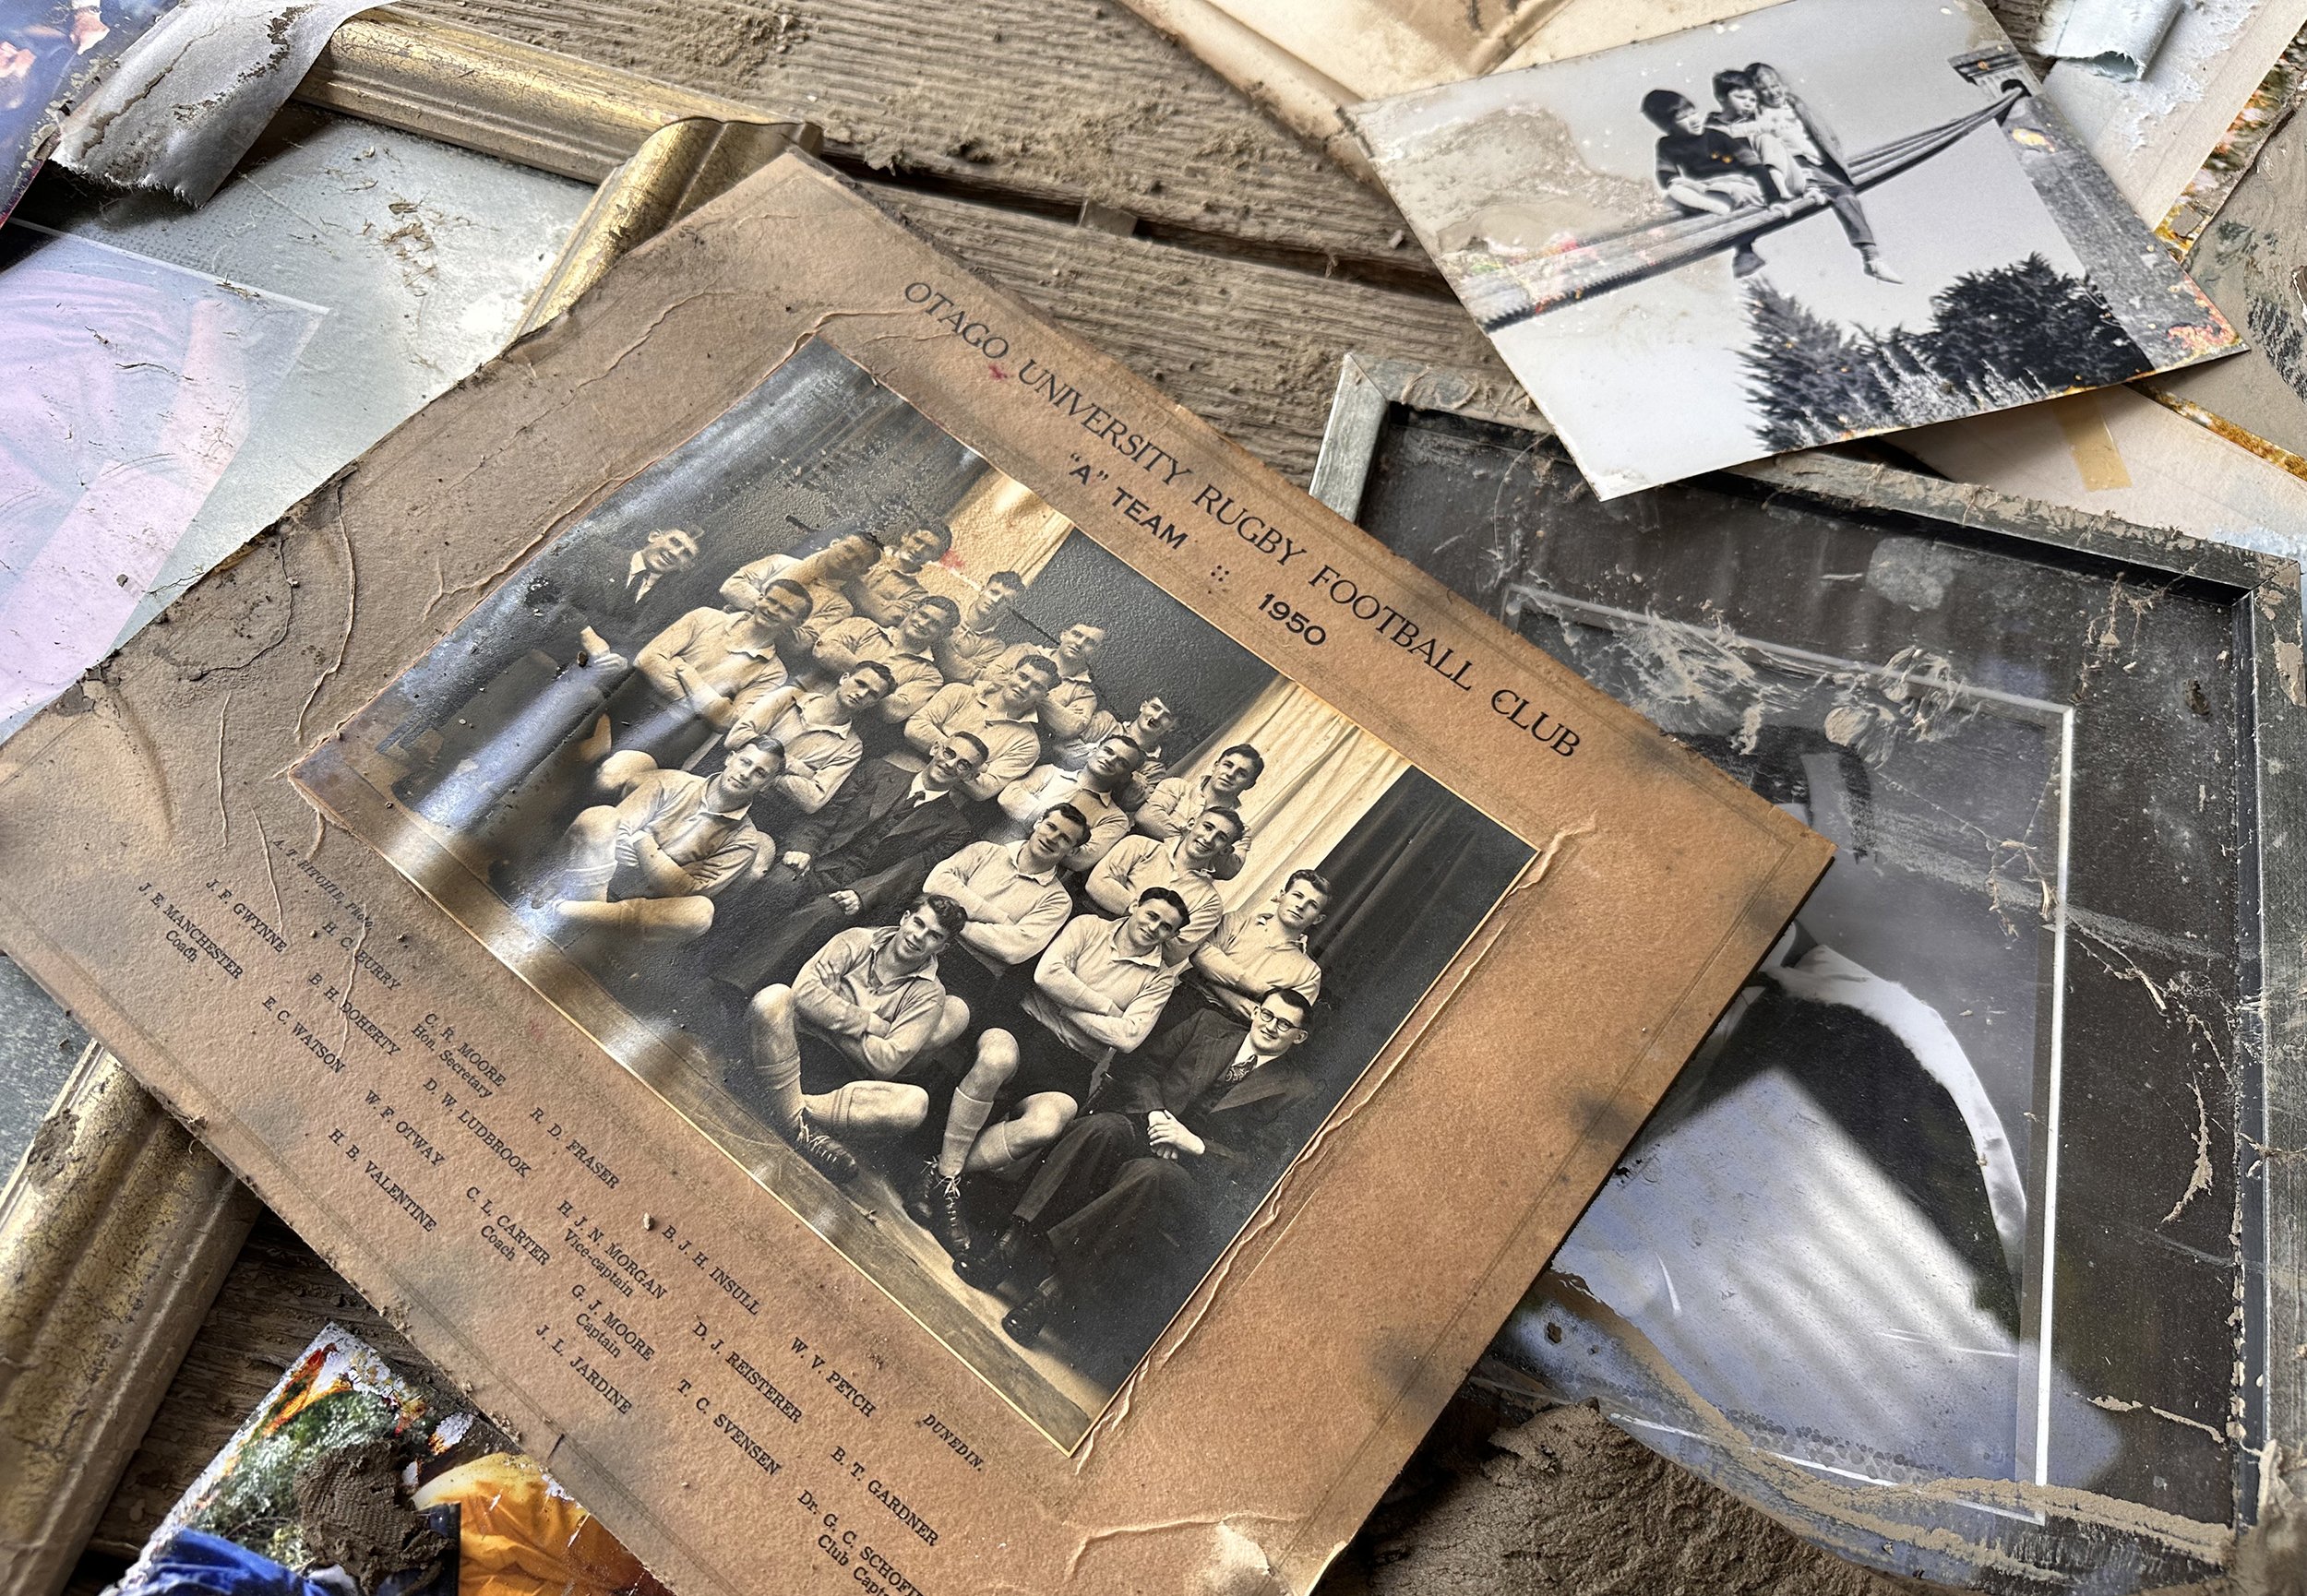
As a photographer, it felt especially gutting to see families walk away from piles of albums, framed photographs and other personal treasures and memories, thinking they couldn’t be salvaged. So in the past week, I’ve taken to gathering up piles of sludgy, soggy treasures, taking them home and applying some good old-fashioned Kiwi DIY restoration methods with some surprisingly positive results.
I know so many of you across Hawke’s Bay will be wondering if you can do the same for your friends and community so here’s a little ‘do’s and don’ts’ workflow to help you with what is a time consuming and very delicate process.
These photos were abandoned because it was thought they were too damaged to save. But careful cleaning and then digital restoration should save most of them. This process is often emotionally too hard for the families to do themselves so is a great project for friends wanting to help.
1: Breathe and assesS.
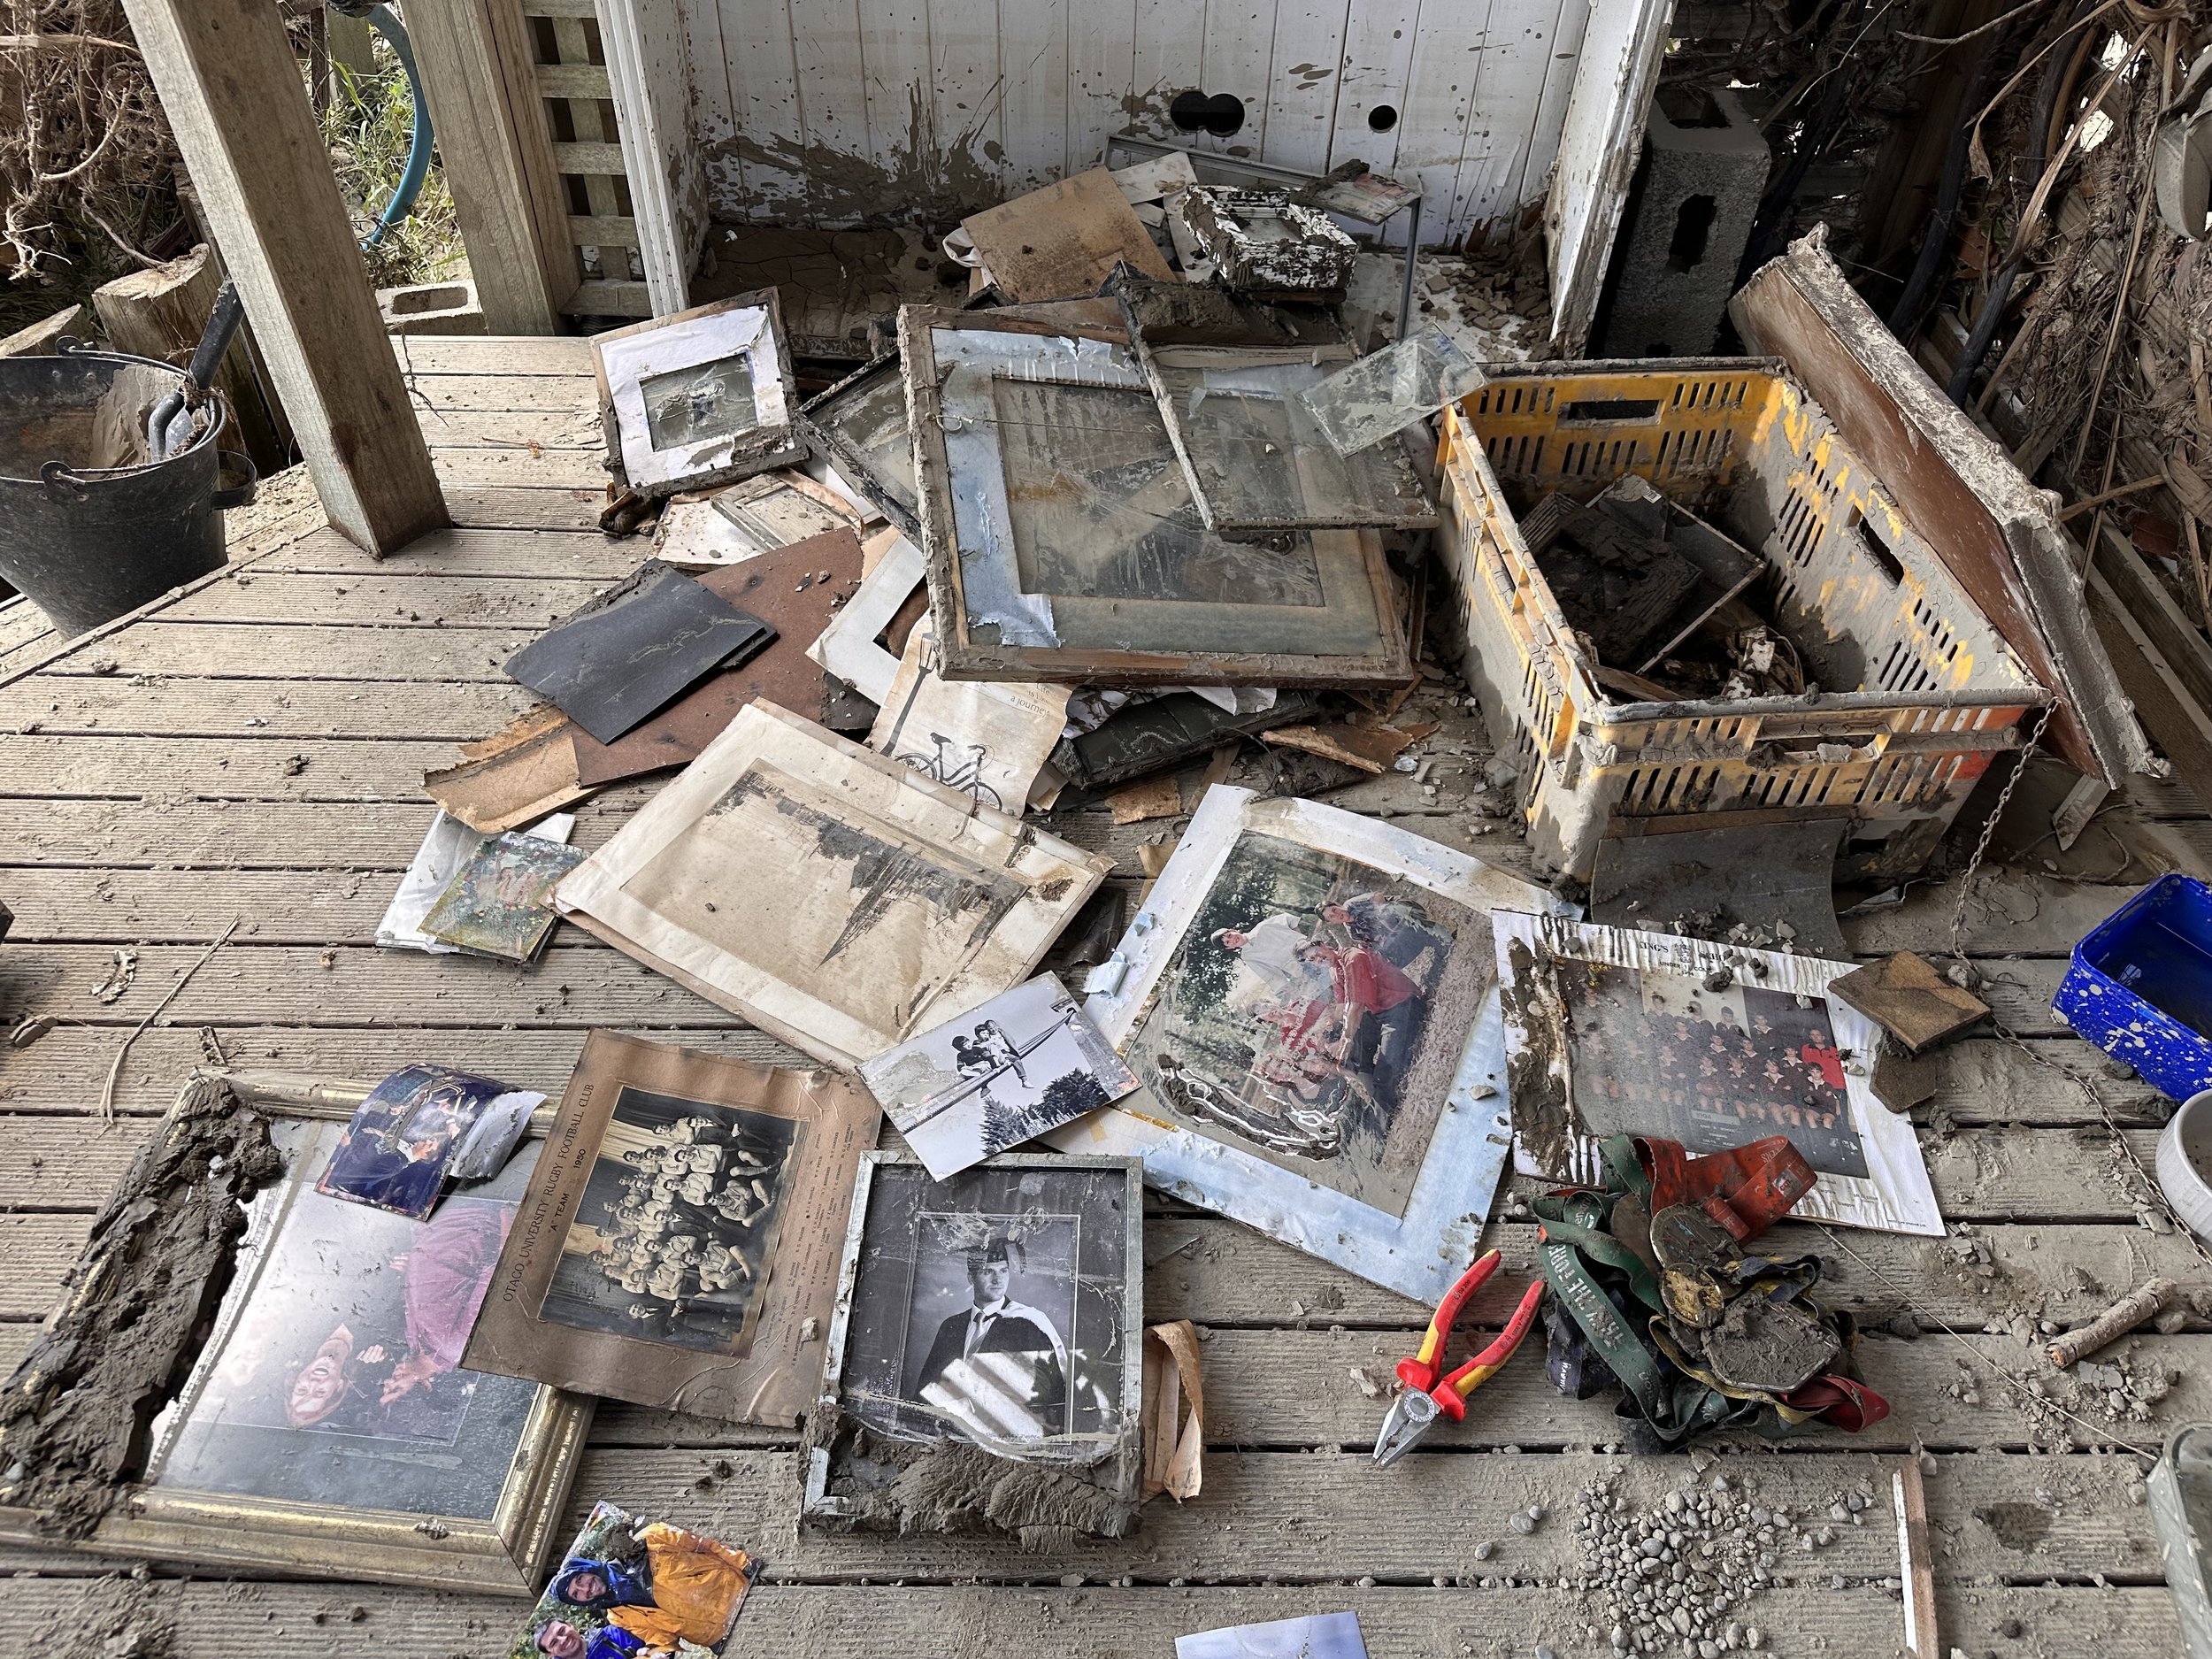
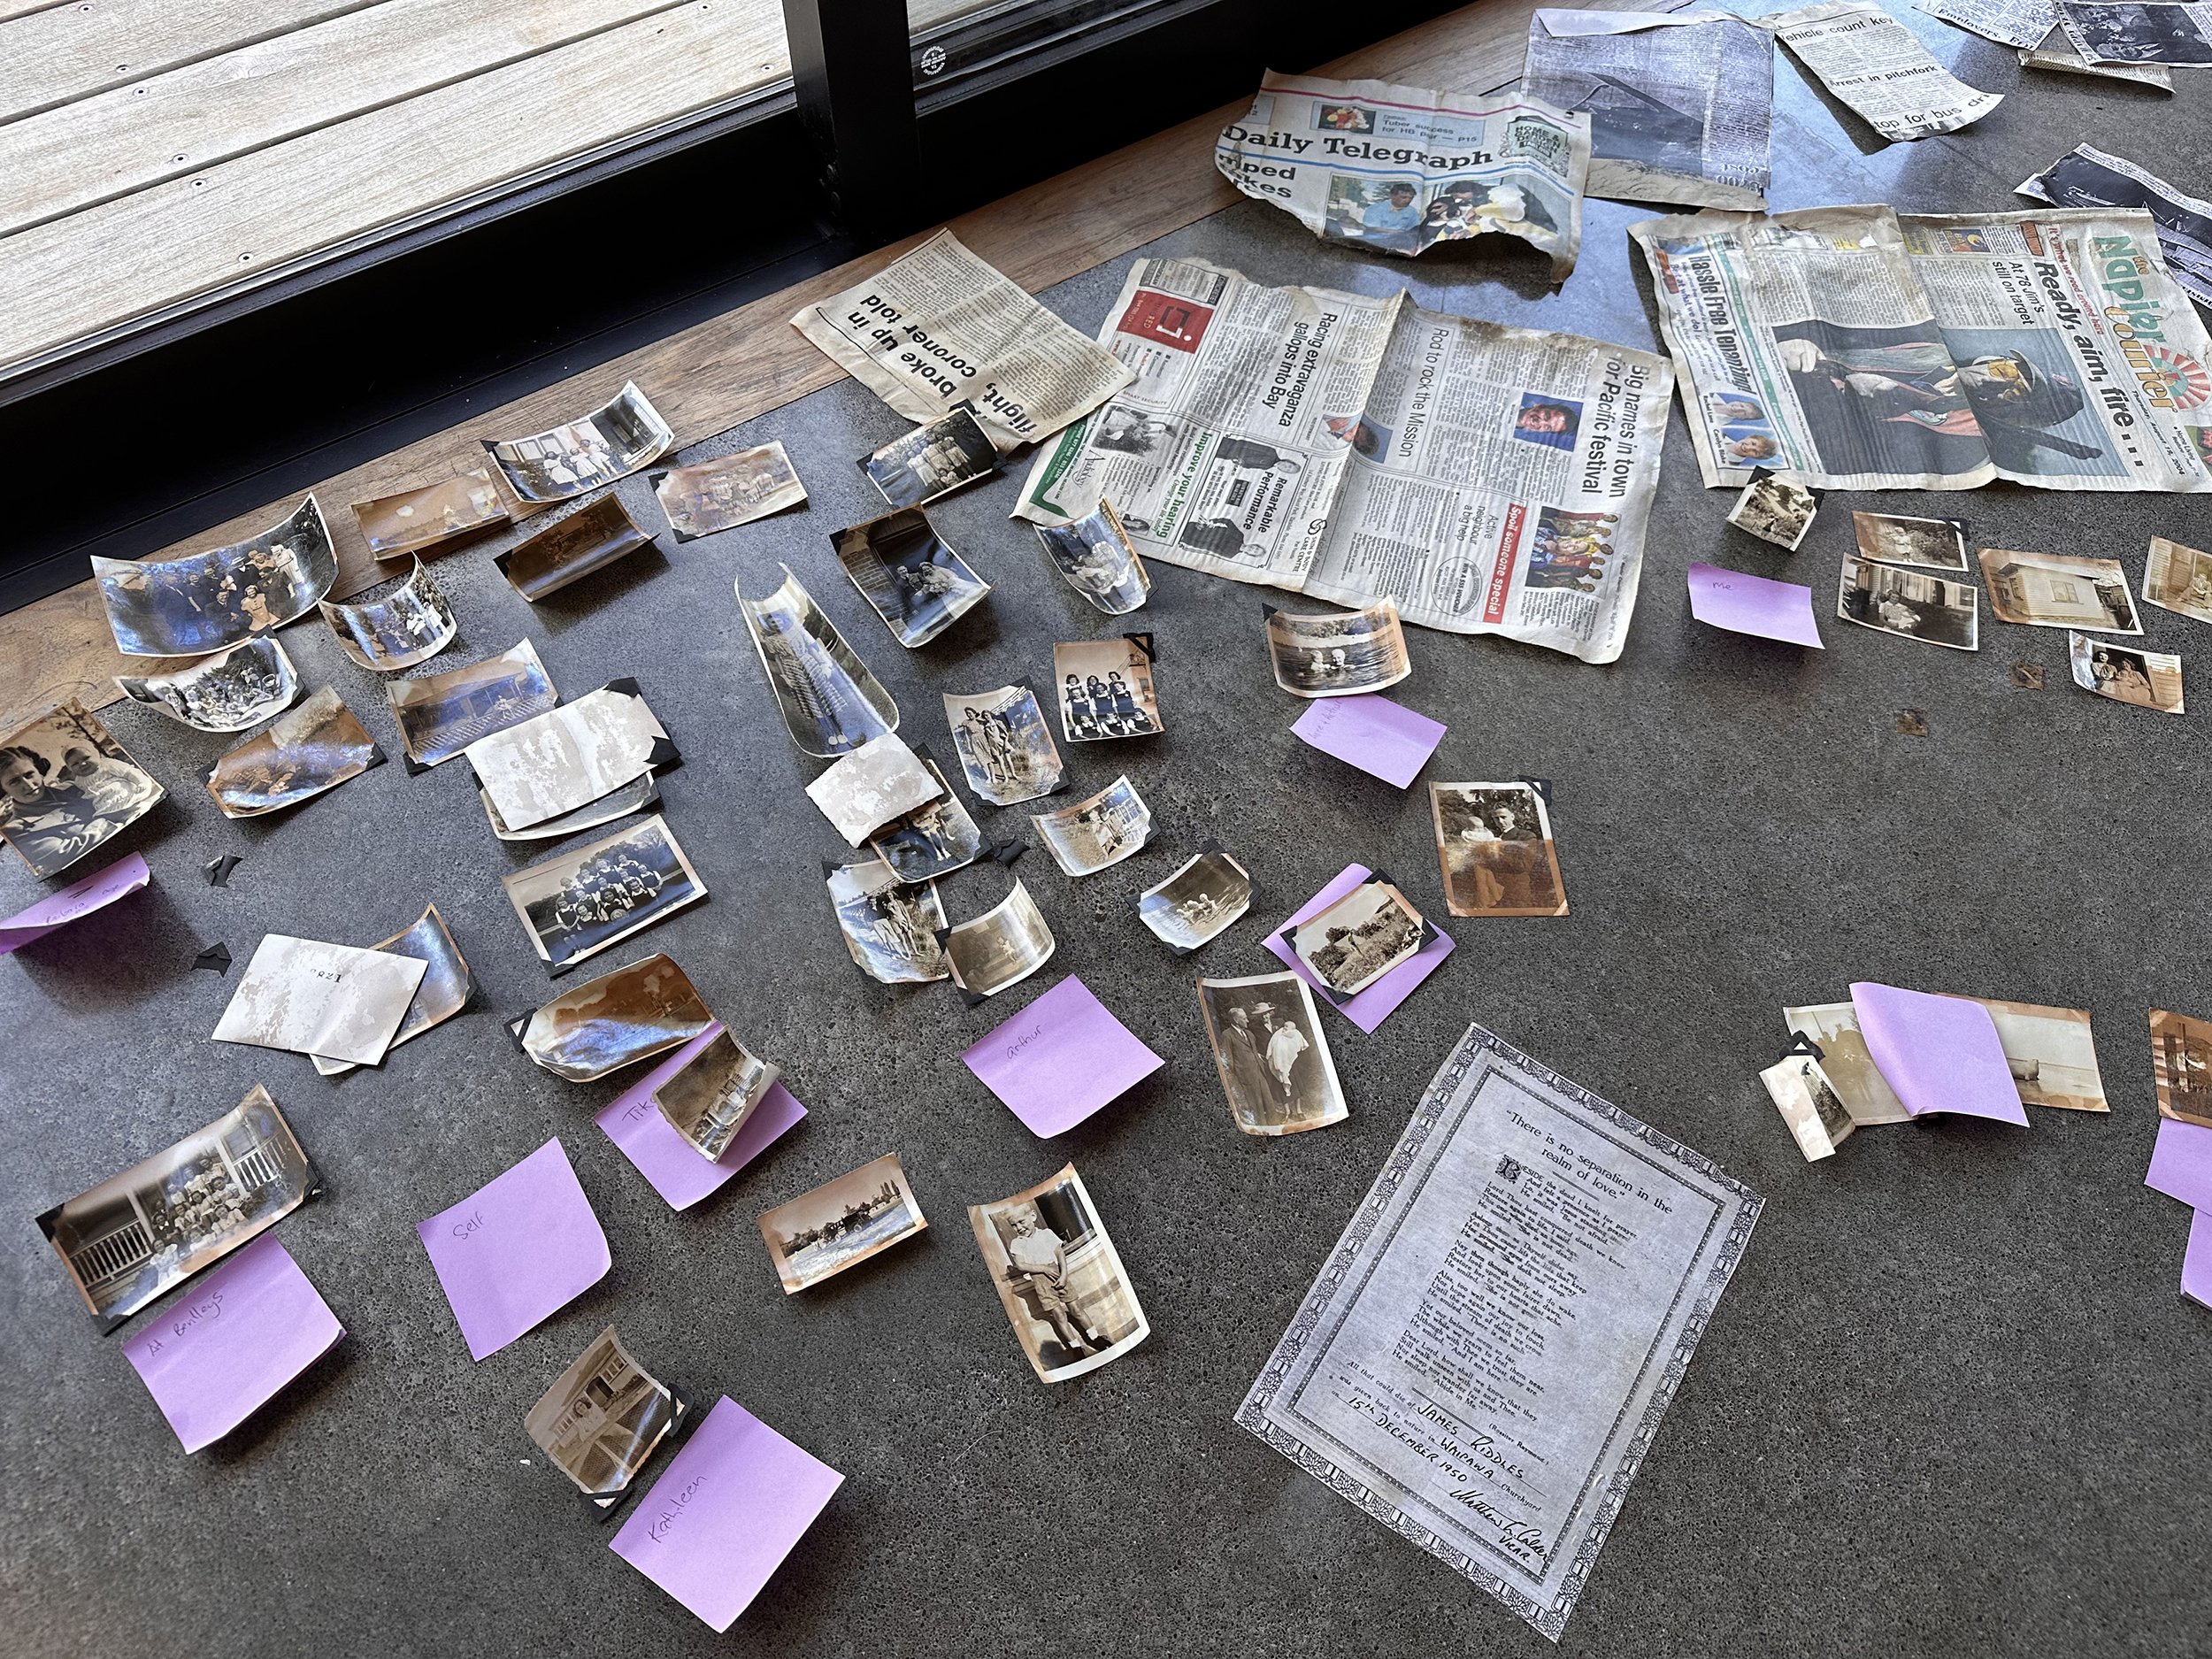
Due to the volume of photos and documents to be salvaged even from one home, it may not be possible to try and save everything. Take stock of your collection and work out what may exist in a digital format and prioritise the photos that are not. Time is of the essence so prioritise colour over black and white photos, which tend to be more stable.
2. FREEZE OR clean?
Currently, Hawke’s Bay and other regions have water restrictions in place. Using lots of tap water to wash photos may not be the best allocation of a scarce resource. Also, you may be flat out with other flood-related projects or simply have to get back to work. Freezing photos won’t damage them and gives you the chance to come back to the salvage project when time and water supplies permit. Make sure you bag them up in manageable sizes and seal in a plastic bin liner so as not to contaminate other freezer food. Shout out to my neighbours who’ve let me load up their spare freezer with random bags of wet photos!
3. REMOVING PHOTOS FROM ENCLOSURES OR UNSTICKING FROM EACH OTHER.
This is the most delicate part of the process and when most damage can occur. Firstly, ensure your photos are wet before trying to remove from frames or albums. Photos started their life wet and the paper is designed to withstand this (provided it’s what you might call ‘typical photo paper’ rather than matte fine art paper stocks). Soak your photos in a tray of water for a few minutes then carefully pull apart from each other or from their enclosure at an acute angle. Running water over the surface can assist this process. You may see the emulsion (the ‘photo’ itself) come away at parts in this process, particularly where silt has been directly touching it or the photo has dried against another photo or glass/plastic cover. If this happens, stop immediately and consider if the photo is precious enough to save and send to a conservator.
If photos are framed and have been submerged in flood waters, it is unlikely you can save the frame or matte and it’s important to remove the photo quickly to avoid mould developing. Where a photo is adhered to backing card, it can be very hard to remove it from this without damaging the photo so it’s best to leave it (for now at least) and dry the backing out along with the photo. If the photo has dried and attached to the glazing, try soaking the glass and photo for a few minutes. If it won’t easily separate, leave the glass in place. It’s possible to clean the glass and create a digital image of the photo through the glass.
4. CLEANING
Using cold running water, support the photo from behind with card or your hands and attempt to wash the silt off. I have been using my fingertips to push off surface silt where running water isn’t enough. Don’t use any materials (cloths etc) or detergents. Where silt has been sitting, sadly I’ve found the emulsion is destroyed, but often this is on the edge of the photo only and even though it looks rough, the main part of the photo (and the memory it represents) survives.
5. DRYING
Drain excess water from the photo and lie face up on a flat, clean and ideally absorbent surface (paper towels/sheets/unprinted newsprint etc). If like me you have too many for this and don’t want to create more washing while water is scarce, the floor is fine. Keep the air around the photos circulating - an open window or fan is good - to avoid mildew and mould developing. Photographs may curl during drying but can be flattened later under a heavy object or carefully with an iron on low heat between baking paper or similar.
6. SALVAGING NEGATIVES AND SLIDES
Wash as per printed photos and dry vertically. You can hang them on the line with a peg attached to the edge or prop up on their sides. The same process applies to slides but if they have been in flood waters, you will need to remove and dispose of the frames and remove the glass prior to drying.
7. RESTORING DAMAGED, DRIED PHOTOS
It’s inevitable that flood damaged photos will be worse for wear despite your most careful efforts. Depending on the amount of damage and the value of the photo, you can have them scanned to create a digital image and then uploaded to a site that specialises in digital photo restoration. I’ve used retouchup.com in the past but there are many companies who offer this service, including NZ-based ones. Even when photos have sustained significant damage and loss of emulsion (the picture), results can be impressive, however this is expensive and time consuming (see note below on insurance).
saving paper documents
This isn’t my area of expertise but as I’ve been washing photos, I’ve also been doing my best to save other items typically stored with them; certificate, old and important newspaper clippings, school reports and children’s artworks. Due to the porous nature of the paper stock, these items don’t like water or any kind of attempt to clean them so I’ve simply been leaving them to dry (don’t try to pull apart or separate while wet) and then opening out and laying on a flat surface. Yes, they may be covered with mud but the memory endures beyond this and that’s the most important thing.
insurance
While it’s a given that insurance claims will take into account the cost of replacing household items like furniture and clothing, don’t forget that while photos have no obvious dollar value, the cost of professionally restoring them can be unexpectedly expensive and should be factored into your insurance claim. Digital restoration can cost between $70-150/image and when you have a ruined wedding album of 50 images not to mention even a small collection of other precious family photos, you can quickly be facing a bill of many thousands of dollars. Framing is also expensive and is another consideration if you intend to reframe any restored photos or artworks. Ask your insurer about this and how to go about ensuring any photo restoration costs are covered in your claim.
professional conservation
My tips for restoration come with a very important caveat: I’m a photographer, not a conservator. I’ve gathered these tips from Mr. Google and through my own (very recent!) experience. If you are in any doubt about how to go about cleaning flood-damaged photos or you simply want to ensure they get the best possible chance of salvage, please freeze your photos then seek out a professional conservator and give the job to them.
CLOUD STORAGE
I say this time and again to the families and couples I work with as a wedding and portrait photographer but please…if you take nothing away from this…make today the day you store all those photos you have sitting around on hard drives or in piles in a shoebox the day you commit to storing them in the cloud. I know we always think in an emergency the first thing we will grab is our wedding album, but Cyclone Gabrielle proved that sometimes there isn’t time even for this. Hard drives can fail, get lost, stolen or damaged and as we know, printed photos can be destroyed. Dropbox, iCloud and other platforms offer free or cheap online storage. If you want to do it properly, you can scan printed photos to create digital copies, but even a quick whip around with your phone camera is better than doing nothing and can avoid a tragic loss of precious memories if we ever face a similar event.
Just finally…
Be realistic about what you’re trying to achieve. Don’t give up simply because the photos look too far gone to save or aren’t cleaning up mint like you’d hoped. Remember…photos are often the only way many of us remember the special moments in our lives, so even if the photo is badly damaged, it’s still a precious link to the past which could otherwise be forgotten. When you think you’ve lost everything, even one salvaged photo can mean a lot.
Presentation is everything and if you’re taking on a salvage project for a friend, it can be the little things that soften the blow of being presented with salvaged but damaged photos. Consider small ways you can beautifully or professionally present the collection….a special box, a fresh new album with photos already in place or using one of the many online photo album companies to make them a new album from digital scans.
And a little plug…
At times like this, we’re all reminded how important our memories of special places and people are. I know we all tend to say ‘I must get around to getting some family photos done’ but life gets busy and it keeps slipping down the to-do list. Put it back to the top and get in touch. And if you know someone whose lost their family photos and you want to do something to help, how about getting them a voucher for a family photo session with me, or one of the many other fantastic Hawke’s Bay photographers. I have an idea floating around in my deep brain about how to help families in this situation but right now, it’s back to that daunting pile in the freezer!